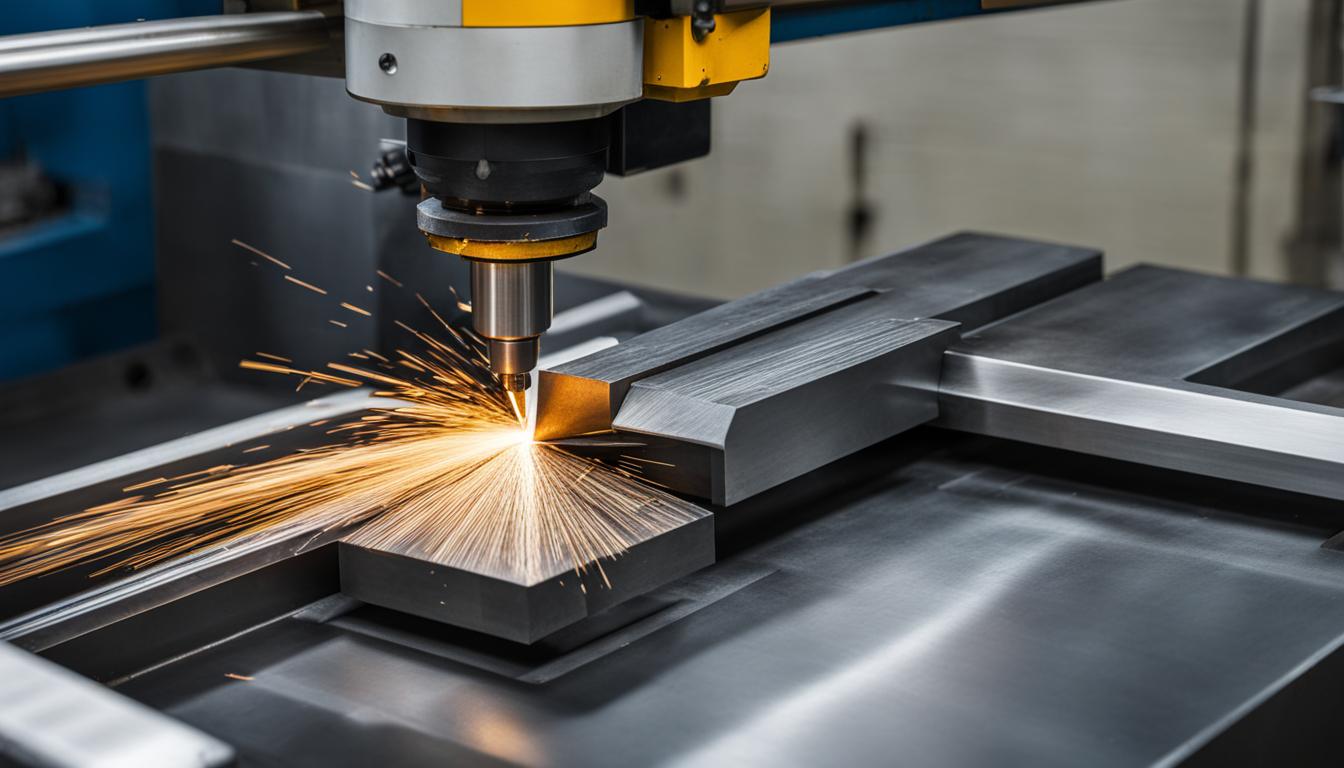
Milling is a crucial process in machining that requires careful consideration of the direction in which the milling cutter moves. The choice of milling direction can significantly impact the precision and finish of the final product. In this comprehensive guide, we will explore the best practices and strategies for determining the optimal direction to mill for superior results.
Before we delve into the specifics of milling direction, let’s first understand the basics of milling. Milling involves using rotary cutters to remove material from the surface of a workpiece. This process can be performed on various types of milling machines, including vertical and horizontal mills. By choosing the appropriate milling techniques and following best practices, operators can achieve precise cuts and excellent surface finishes.
Understanding Milling Basics
Before delving into the specifics of milling direction, it is essential to understand the basics of milling. Milling involves using rotary cutters to remove material from the surface of a workpiece. This process can be performed on various types of milling machines, including vertical and horizontal mills. By choosing the appropriate milling techniques and following best practices, operators can achieve precise cuts and excellent surface finishes.
When it comes to milling basics, there are several key factors to consider for optimal results:
Milling Techniques
The choice of milling techniques can greatly impact the outcome of the milling process. Different techniques, such as face milling, peripheral milling, or contour milling, are used depending on the desired shape and features of the workpiece.
Milling Best Practices
Following best practices is crucial in achieving successful milling outcomes. This includes using appropriate cutting speeds, feeds, and depths of cut to ensure efficient material removal and minimize tool wear. Additionally, proper tool selection and maintenance play a vital role in achieving accurate and consistent results.
Here is an example table summarizing some common milling techniques and best practices:
| Milling Technique | Best Practices |
|---|---|
| Face Milling | Use a large-diameter cutter for efficient material removal. Consider using a climb milling technique for smoother surface finish. |
| Peripheral Milling | Use multiple passes with a smaller-diameter cutter for accuracy. Maintain consistent feed rates to prevent tool chatter. |
| Contour Milling | Employ adaptive milling techniques to maintain constant tool engagement. Utilize high-speed machining strategies for improved efficiency and reduced cycle times. |
By understanding the basics of milling, including different techniques and best practices, operators can lay a solid foundation for achieving optimal milling results.
Types of Milling Operations
There are different types of milling operations that are specifically tailored to meet various machining requirements. Understanding these milling operations is crucial in determining the appropriate direction to mill for different types of cuts. Let’s take a closer look at two common types of milling operations: face milling and peripheral milling.
Face Milling
Face milling involves cutting flat surfaces into the workpiece. It is a widely used milling operation that is suitable for creating large, flat areas on a workpiece. During face milling, the milling cutter rotates perpendicular to the workpiece and removes material from the surface, resulting in a smooth and flat finish. This type of milling operation is often used in applications where precision and surface finish are essential, such as in the automotive and aerospace industries.
Peripheral Milling
Peripheral milling focuses on cutting along the circumference of the cutter. It is commonly used for contouring, slotting, and side milling operations. During peripheral milling, the milling cutter rotates parallel to the workpiece, cutting along the outer edges of the cutter. This type of milling operation is ideal for creating complex shapes, profiles, and pockets on the workpiece. It is often used in industries such as mold-making, jewelry fabrication, and precision engineering.
To determine the appropriate direction for milling, operators need to consider the type of cut they intend to make and choose the corresponding milling operation. By understanding the characteristics and applications of face milling and peripheral milling, operators can optimize the milling direction for specific machining requirements.

Factors Influencing Milling Direction
Several factors play a crucial role in determining the milling direction for optimal machining results. The feed rate and cutter rotation are key considerations that operators must take into account. Let’s examine these factors in detail.
Feed Rate
The feed rate refers to the speed at which the workpiece moves through the milling cutter. It directly influences the direction in which the milling operation should be performed. Higher feed rates typically require milling in an opposite direction, while lower feed rates often require milling with the same direction as the cutter rotation.
When the feed rate is high, milling in the opposite direction helps prevent chip recutting and promotes efficient chip evacuation. This reduces the risk of chip clogging, which can negatively impact surface finish and tool life. On the other hand, lower feed rates may benefit from milling in the same direction as the cutter rotation to ensure the desired cutting action and chip formation.
Cutter Rotation
The rotation direction of the milling cutter is another crucial factor that affects the milling direction. Depending on the cutter’s design and cutting edges, the milling operation may be more efficient and produce better results when the cutter rotates in a specific direction.
It is important to follow the manufacturer’s guidelines and recommendations regarding cutter rotation direction. Some cutting tools are designed to work optimally when rotated in a certain direction, while others may perform better in the opposite direction. By aligning the milling direction with the cutter rotation, operators can achieve improved cutting performance and enhanced surface finish.
To visualize these factors and their influence on milling direction, refer to the table below:
| Feed Rate | Cutter Rotation | Optimal Milling Direction |
|---|---|---|
| High | Same | Same as cutter rotation |
| High | Opposite | Opposite of cutter rotation |
| Low | Same | Same as cutter rotation |
| Low | Opposite | Opposite of cutter rotation |
Adjusting Factors for Desired Outcome
Operators need to analyze the specific requirements of the milling operation, including the workpiece material, geometry, and desired outcome. By considering the feed rate and cutter rotation, operators can make necessary adjustments to achieve the desired milling direction and optimize the overall machining process.
The interplay between these factors and their influence on milling direction underscores the importance of proper planning and adjustment. By carefully considering the feed rate and cutter rotation, operators can maximize productivity, improve surface finishes, and extend tool life.
Importance of Workpiece Orientation
The orientation of the workpiece relative to the milling cutter plays a crucial role in achieving optimal results in milling operations. The choice of workpiece orientation directly impacts both the precision of the cuts and the surface finish of the final product. To achieve the best possible outcome, operators must carefully consider the workpiece orientation and align it with the desired milling direction.
Workpiece orientation refers to how the workpiece is positioned in relation to the milling cutter. It determines the angle at which the cutter engages with the material, influencing the path of the cutter and the resulting machined surface. By selecting the appropriate workpiece orientation, operators can enhance milling precision and achieve the desired surface finish.
When determining the workpiece orientation, several factors should be taken into account. These factors include the geometry and material of the workpiece, the desired cutting strategy, and the specific machining requirements. By considering these factors, operators can make informed decisions about how to position the workpiece to optimize milling results.
Proper workpiece orientation can improve milling precision by minimizing potential issues such as tool deflection and chatter. When the workpiece is correctly oriented, the forces applied by the milling cutter are distributed evenly, reducing the risk of vibration and ensuring consistent cuts. This leads to higher accuracy and dimensional stability in the machined part.
Additionally, workpiece orientation directly affects the surface finish of the final product. By aligning the workpiece in the optimal position, operators can minimize surface defects and achieve a smoother finish. This is particularly important for applications where aesthetics or functional requirements demand a high-quality surface.
Here are some key benefits of considering workpiece orientation in milling operations:
- Improved milling precision
- Enhanced surface finish
- Reduced tool deflection and chatter
- Optimized chip evacuation
- Increased dimensional stability
Overall, workpiece orientation plays a critical role in achieving superior milling results. By carefully analyzing the workpiece characteristics and considering the desired milling direction, operators can ensure precise cuts and excellent surface finishes.
Choosing the Right Milling Cutter
Selecting the right milling cutter is crucial for achieving the desired results in milling operations. The choice of cutter geometry and material directly impacts the cutting action, chip formation, tool life, and the quality of the cuts. By carefully considering these factors, operators can determine the most suitable milling cutter for their specific application.
Cutter Geometry
The cutter geometry plays a significant role in the effectiveness of the milling process. The number of teeth and the shape of the cutting edges are key factors that influence the cutting action and chip formation. A higher number of teeth on the milling cutter can result in smoother cuts and better surface finishes. Different types of cutting edges, such as square, ball nose, or corner radius, offer unique benefits for specific machining needs. Understanding the workpiece material, desired surface finish, and the type of cuts required are essential in selecting the appropriate cutter geometry.
Cutter Material
The choice of cutter material is critical in determining the tool life and the quality of the cuts. Different materials offer varying levels of hardness, toughness, and heat resistance, which directly impact the cutter’s performance. Common materials used for milling cutters include high-speed steel (HSS), cobalt, carbide, and diamond-coated tools. Each material has its advantages and limitations, making it important to consider factors such as cutting speed, feed rate, and the workpiece material when selecting the cutter material.
For example, HSS cutters are cost-effective and suitable for general-purpose milling operations, while carbide cutters offer higher hardness and wear resistance for demanding applications. Diamond-coated cutters excel in machining abrasive materials, providing extended tool life.
Cutter Geometry and Material Comparison
| Cutter Geometry | Advantages | Disadvantages |
|---|---|---|
| Square | Efficient for general milling | May leave corner marks |
| Ball Nose | Smooth cutting action, perfect for 3D contours | Less efficient for roughing operations |
| Corner Radius | Resistant to chipping, versatile for various cuts | Requires precise programming for effective use |
When it comes to cutter material, consider the following:
- High-Speed Steel (HSS): Cost-effective and suitable for general-purpose milling
- Cobalt: Enhanced heat resistance and suitable for high-speed applications
- Carbide: Excellent hardness and wear resistance for demanding applications
- Diamond-Coated: Extended tool life and ideal for machining abrasive materials
By carefully evaluating the cutter geometry and material, operators can make informed decisions that align with their machining requirements. This thoughtful selection process ensures the highest level of performance, productivity, and efficiency in milling operations.

Tips for Optimal Milling Direction
To achieve the best results in milling, operators can follow certain tips and strategies. It is essential to plan the milling direction before starting the operation, considering factors such as the geometry of the workpiece and the desired surface finish. Operators should also make appropriate adjustments to the feed rate and cutter rotation to optimize the milling direction. By implementing these tips and strategies, operators can maximize the efficiency and precision of their milling processes.
Here are some valuable milling tips and strategies to ensure optimal milling direction:
- Study the workpiece geometry: Before commencing the milling process, carefully analyze the shape and complexity of the workpiece. Understanding the workpiece’s design and contours will help determine the most suitable milling direction.
- Consider the desired surface finish: The surface finish requirement for the final product plays a crucial role in determining the ideal milling direction. Smooth surfaces may require different milling strategies compared to rough or textured surfaces.
- Test different milling directions: Conducting test runs using various milling directions can help identify the optimal approach. By observing the results and surface quality, operators can choose the direction that yields the best outcome.
- Adjust the feed rate: The feed rate, or the speed at which the workpiece moves through the cutter, is a vital factor in achieving optimal milling direction. Experiment with different feed rates to find the balance between material removal and surface finish.
- Optimize cutter rotation: The rotation direction of the milling cutter can significantly impact the milling direction. Adjusting the cutter rotation, such as clockwise or counterclockwise, can optimize the cutting action and chip evacuation.
- Use climb milling for smooth finishes: Climb milling involves feeding the workpiece in the same direction as the rotation of the cutter. This technique can result in smoother surface finishes but requires careful consideration to avoid chatter or tool deflection.
- Apply conventional milling for heavy cuts: In contrast to climb milling, conventional milling involves feeding the workpiece against the rotation of the cutter. This technique is suitable for heavier cuts and can provide better stability and chip control.
- Maintain proper tool engagement: Ensuring the correct tool engagement is critical for achieving optimal milling direction. Too little or too much engagement can affect the chip formation, surface finish, and tool life.
Case Study: Comparing Climb Milling and Conventional Milling
Let’s examine a table showcasing the differences between climb milling and conventional milling:
| Milling Technique | Advantages | Disadvantages |
|---|---|---|
| Climb Milling |
|
|
| Conventional Milling |
|
|
By considering these milling tips and strategies, operators can enhance their milling processes by optimizing the milling direction. Experimentation, proper planning, and adjustments to feed rate and cutter rotation will lead to improved efficiency, precision, and surface finish in milling operations.
Common Challenges in Milling Direction
Despite careful planning and execution, operators may encounter challenges in determining the optimal milling direction. Issues such as chip evacuation and tool deflection can significantly impact the accuracy and surface finish of the cuts. In order to overcome these challenges and achieve the desired milling results, it is crucial to understand and address them effectively.
Chip evacuation refers to the process of removing the chips or debris generated during the milling operation. If chip evacuation is not managed properly, the chips can get trapped between the cutting tool and the workpiece, leading to poor cutting performance and potential damage to the tool. To ensure effective chip evacuation, operators can consider the following strategies:
- Using high-pressure coolant systems or air blasts to remove chips from the cutting area
- Using specialized tool coatings or lubricants to reduce chip adhesion
- Optimizing the cutting parameters, such as feed rate and depth of cut, to promote efficient chip formation and evacuation
Tool deflection is another common challenge in milling that can affect the accuracy of the cuts. When the cutting forces exerted on the tool exceed its rigidity, the tool can bend or deflect, leading to deviations in the machined features. To minimize tool deflection, operators can consider the following approaches:
- Using shorter and more rigid tooling to reduce the risk of deflection
- Reducing the radial engagement (width of cut) to decrease the cutting forces
- Employing vibration-damping techniques, such as anti-vibration tool holders or tool path optimization, to mitigate tool deflection
By addressing these common challenges of chip evacuation and tool deflection, operators can enhance the accuracy, surface finish, and overall productivity of their milling operations. Implementing appropriate solutions and techniques, along with proper tool selection and machine setup, will help achieve optimal results.
Common Challenges in Milling Direction Summary:
| Challenge | Impact | Solution |
|---|---|---|
| Chip Evacuation | Poor cutting performance and potential tool damage | Utilize high-pressure coolant systems, specialized tool coatings, optimize cutting parameters |
| Tool Deflection | Deviation in machined features and reduced accuracy | Use shorter and rigid tooling, reduce radial engagement, employ vibration-damping techniques |
Industry Applications
Milling is a versatile machining process that finds extensive applications across various industries. Its ability to deliver precision machining plays a vital role in the production of intricate components with tight tolerances. Let’s explore some of the key industry-specific milling applications where this process is indispensable.
Automotive
In the automotive industry, milling is widely utilized for the production of engine components, such as cylinder heads and blocks. Engine casings, transmission components, and suspension parts also undergo precision milling to ensure optimal performance and durability. The ability to create intricate shapes and achieve precise dimensional accuracy makes milling an essential process in automotive manufacturing.
Aerospace
Aerospace applications demand the highest levels of precision and quality. Milling is crucial in the production of aerospace components, including turbine blades, structural parts, and aerospace-grade aluminum alloys. By employing industry-specific milling techniques, such as high-speed machining and multi-axis milling, manufacturers can achieve the tight tolerances required for aerospace applications.
Electronics
The electronics industry relies heavily on milling for the production of printed circuit boards (PCBs) and electronic housing components. Milling enables the creation of intricate circuitry patterns and precise cutouts for electronic components. With the increasing complexity of electronic devices, precision machining through milling ensures optimal functionality and performance.
Medical Devices
Precision is paramount in the manufacturing of medical devices, where even the smallest discrepancy can have significant consequences. Milling is used to create implantable components, surgical instruments, and prosthetics with exceptional accuracy and surface finishing. The ability to fabricate complex geometries and achieve tight tolerances makes milling a critical process in the medical device industry.
Industry Applications of Milling
| Industry | Applications |
|---|---|
| Automotive | Engine components, transmission parts, suspension parts |
| Aerospace | Turbine blades, structural parts, aerospace-grade alloys |
| Electronics | Printed circuit boards (PCBs), electronic housing components |
| Medical Devices | Implantable components, surgical instruments, prosthetics |
The precise milling techniques employed in these industries ensure the quality, functionality, and performance of their respective products. By understanding the specific requirements and leveraging industry-specific milling strategies, operators can achieve superior results in precision machining applications.
Conclusion and Key Takeaways
Choosing the correct milling direction is paramount in achieving precise cuts and exceptional surface finishes. By carefully considering factors such as feed rate, workpiece orientation, and cutter selection, operators can optimize the milling direction to suit their specific application.
Throughout this comprehensive guide, we have explored the fundamentals of milling, different types of milling operations, and the factors that influence the choice of milling direction. We have also discussed the importance of workpiece orientation and the selection of the right milling cutter. Armed with this knowledge, operators can confidently navigate the complexities of milling and enhance their machining processes.
Moreover, by following the tips and strategies outlined in this guide, operators can overcome common challenges that may arise during milling operations. From effective chip evacuation to minimizing tool deflection, understanding and addressing these challenges is essential in achieving superior milling results.
In conclusion, the successful execution of milling processes hinges on selecting the most suitable milling direction. By incorporating the key takeaways detailed in this guide, operators can optimize their milling operations, achieve higher precision, and elevate the quality of their finished products.