A router is a versatile power tool that can greatly enhance your woodworking projects. Whether you want to make customized cuts, shape the edges of a board, create finished laminate edges, or even make special joints and detailed mouldings, a router can be your go-to tool. In this comprehensive guide, we will walk you through the process of using a router to cut wood efficiently and with precision.
Key Takeaways
- Utilize a router to make customized cuts, shape board edges, and create detailed mouldings.
- Ensure safety by wearing protective gear and planning your cuts carefully.
- Understand the different types of routers, including handheld and table routers.
- Practice your technique on scrap wood and determine the safe feed rate before starting your project.
- Learn how to cut grooves and rout edges for added versatility and precision.
Router Basics and Safety
Before diving into the world of woodworking with a router, it’s crucial to build a solid foundation of router basics and prioritize safety. This section will provide an overview of the essential knowledge needed to use a router effectively and safely.
Getting to Know Your Router
A router is a versatile power tool that can be handheld or mounted to a table. Handheld routers are ideal for small-scale DIY woodworking projects, making them a great starting point for beginners. These routers allow for more flexibility and maneuverability when working with different materials and angles.
On the other hand, table-mounted routers are typically used for larger projects and offer increased stability. They are commonly mounted under a table, allowing for precise and controlled cuts.
Important Safety Measures
When working with a router, safety should always be a top priority. Follow these essential safety guidelines to minimize the risk of accidents:
- Wear appropriate safety gear, including safety glasses and ear protection, to protect yourself from flying debris and excessive noise.
- Remove jewelry, tie back long hair, and avoid wearing loose clothing that could get caught in the router.
- Always maintain a firm grip on the router, ensuring secure control and stability throughout the cutting process.
It is recommended to wear a dust mask or use a dust collection system to minimize exposure to wood dust, which can be harmful when inhaled.
Planning Your Cuts for Safety
Prioritize safety by planning your cuts before turning on the router. Take the time to mark your wood piece and determine the appropriate depth and speed for your desired cut.
By carefully considering your cutting path and incorporating techniques like climb cutting to minimize tear-out, you can prevent accidents and achieve cleaner results.
Remember, safety is paramount when using a router, so always double-check your setup and follow safety practices to ensure a safe and enjoyable woodworking experience.
Router Mounting and Router Types
When it comes to using a router, it’s important to explore both the mounting options and the different types of routers available. Router mounting refers to the method of securing the router in place, while router types determine the purpose and functionality of the tool.
Router Mounting
Routers can be mounted in two main ways: on a workbench or a router table. Mounting a router upside down underneath a table turns it into a small shaper, which is particularly useful for creating detailed mouldings. This configuration provides stability and control, allowing for precise woodworking.
The table router setup also offers the advantage of a fence, which helps guide the wood along the desired path, ensuring straight and accurate cuts. This makes it easier to feed the stock from right to left along the fence, resulting in consistent and reliable results.
Router Types
There are different types of routers available, each serving different purposes. The two main types are handheld routers and table routers, both of which have specific applications and benefits.
Handheld routers: These routers are typically smaller and lightweight, making them perfect for handheld use. They are ideal for tasks such as trimming laminate, cutting grooves, or creating decorative edges on individual pieces of wood. Handheld routers allow the user to move the tool in various directions, depending on the orientation of the bit being used. This versatility is advantageous for performing intricate woodworking tasks or working on irregularly shaped workpieces.
Table routers: As mentioned earlier, table routers are mounted underneath a table, transforming them into stationary tools. The router bit faces upward and remains stationary, while the operator moves the wood over the bit. This setup offers increased stability and control, making it suitable for larger woodworking projects or when working with longer and wider pieces of wood. Table routers are especially effective for repetitive cuts and tasks that require precision and accuracy.
Knowing the different mounting options and router types allows woodworkers to choose the most appropriate setup for their specific projects. Whether it’s handheld routing for detailed work or table routing for larger-scale tasks, understanding the benefits and applications of each type of router empowers users to achieve professional-quality results.
| Router Mounting | Router Types |
|---|---|
| Workbench | Handheld |
| Router Table | Table |
| Makes the router stationary | Allows for handheld use |
| Offers stability and control | Delivers precision and accuracy |
| Ideal for small, detailed tasks | Suitable for larger woodworking projects |
How to Use a Router
Properly using a router involves taking your time and practicing your technique on scrap wood. It is important to make shallow test cuts to determine a safe feed rate and to figure out the cut speed and the amount of wood to remove with each pass.
When using a router, it is recommended to use a push stick when the wood is nearly through to protect your fingers from the bit. This tool ensures safety while allowing for precise control.
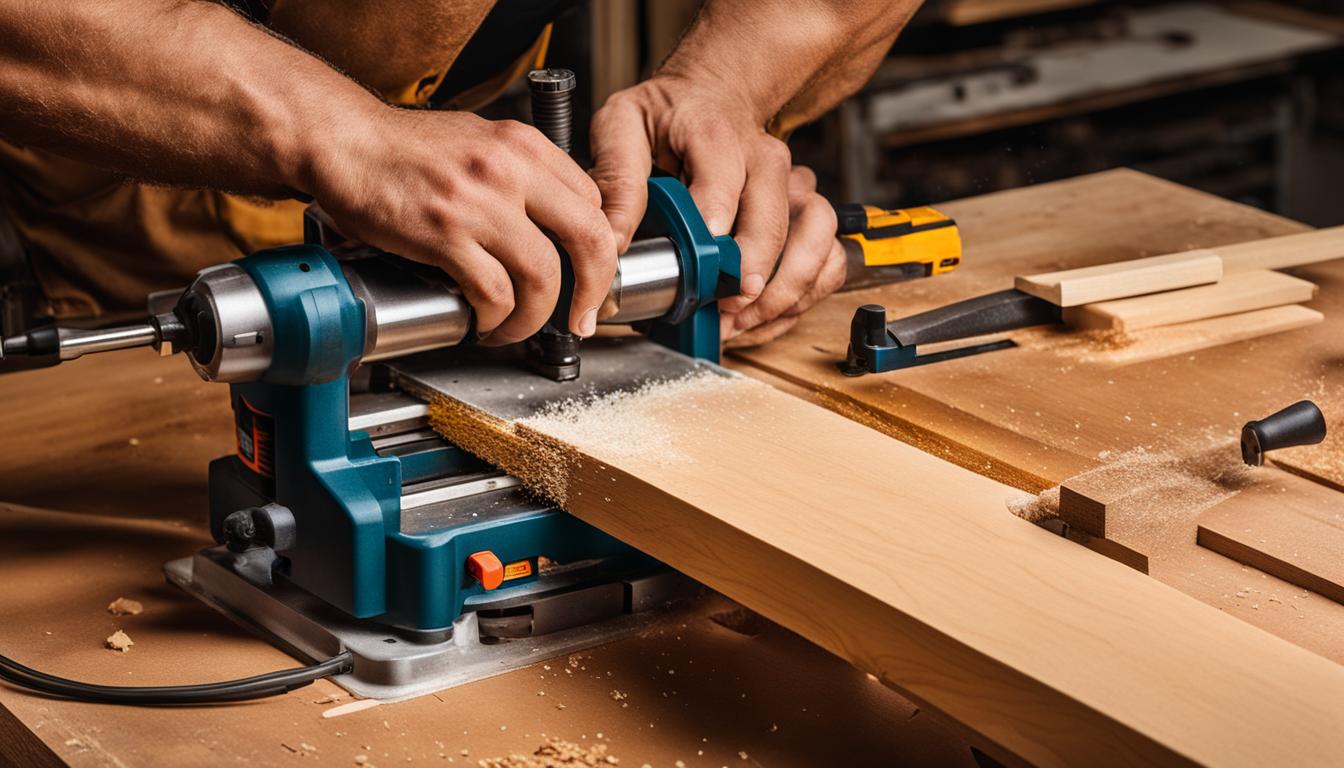
It is essential to work slowly, especially when using a table router. Feed the wood slowly from right to left to ensure proper cutting and avoid climb cutting, which can be dangerous. This technique ensures smoother results and minimizes the risk of damaging the router or the project.
By following these guidelines, you can master the art of using a router and achieve professional-grade results in your woodworking projects.
Router Usage Tips
- Take your time and practice on scrap wood before working on your actual project.
- Make shallow test cuts to determine the safe feed rate.
- Use a push stick when the wood is nearly through to protect your fingers.
- Feed the wood slowly from right to left when using a table router.
- Avoid climb cutting to ensure safe and smooth operation.
How to Cut Grooves and Rout Edges
Cutting grooves and routing edges with a router is a versatile technique that adds dimension and detail to your woodworking projects. Whether you want to create decorative grooves for joinery or route smooth edges for a professional look, the router is the tool for the job.

How to Cut Grooves with a Router
To cut a groove with a router, you’ll need to follow a few simple steps:
- Set up the cut: Begin by securing the workpiece firmly on a stable surface. Mark the position and width of the groove on the wood. Use a straight edge or guide to ensure straight cuts.
- Adjust the bit depth: Choose a router bit that matches the desired groove width. Adjust the router base to the appropriate depth, making sure it aligns with the marked position on the wood.
- Run the wood through the router: Start the router and slowly guide the wood along the marked path, applying gentle pressure. Make multiple passes if necessary to achieve the desired groove depth.
How to Rout Edges with a Router
Routing edges with a router is a technique commonly used for creating smooth, decorative edges on wood. Follow these steps to rout edges effectively:
- Select the right bit: Choose a router bit with a bearing that matches the desired edge profile. Common profiles include round-over, chamfer, and ogee.
- Make multiple passes: Start by positioning the router bit slightly away from the edge. Gradually move the bearing closer to the edge with each pass to achieve a smooth, consistent finish.
- Listen and adjust: Pay attention to the sound and feel of the router as you work. If there is any resistance or chatter, make necessary adjustments to ensure optimal results.
Remember to always prioritize safety when working with a router. Use protective gear such as safety glasses, ear protection, and a dust mask. Keep your hands and fingers away from the router bit and maintain a secure grip on the tool.
| Router Technique | Benefits |
|---|---|
| Multiple Passes | Ensures precise and controlled cutting |
| Proper Bit Selection | Allows for customization and variety in edge profiles |
| Slow and Steady Feed Speed | Produces clean and smooth finishes |
How to Change Router Bits
When working with a router, it is essential to know how to change router bits efficiently and safely. Whether you need a different bit for a specific woodworking task or want to switch from a roughing bit to a finishing bit, proper bit changing techniques are crucial. Here’s a step-by-step guide on changing router bits.
1. Disconnect the Power
Before starting the bit change process, make sure to disconnect the power supply to the router. This eliminates the risk of accidental activation and prevents any injuries.
2. Loosen or Tighten the Collet
Most router bits are held in place with a collet. Using the appropriate sized wrench, loosen the collet by turning it counterclockwise. If your router has a dual-wrench collet, use both wrenches to loosen the collet. Alternatively, if your router has a pin lock collet, locate the collet pin and press it down while turning the collet.
3. Remove the Old Bit
Once the collet is loose, remove the old router bit. Gently pull it out of the collet using a twisting motion. Be careful not to touch the sharp edges of the bit.
4. Insert the New Bit
Take the new router bit and insert it into the collet. Make sure the bit goes all the way into the collet so that it is securely held in place. Align the shank of the bit with the opening of the collet.
5. Tighten the Collet
Using the wrenches, tighten the collet by turning it clockwise. Ensure that the bit is firmly held in place without any play or movement. This step is crucial for both safety and the proper operation of the router.
With the new router bit securely in place, you are ready to continue your woodworking project. Remember to always follow safety guidelines and use the appropriate protective gear when operating your router.
| Key Steps | Tips |
|---|---|
| Disconnect the power | – Use a reliable power outlet – Ensure the router is completely powered off |
| Loosen or tighten the collet | – Use the correct wrench size – Follow the router manufacturer’s instructions |
| Remove the old bit | – Handle the bit with care to avoid injury – Safely dispose of the old bit |
| Insert the new bit | – Align the shank properly – Make sure the bit is fully inserted |
| Tighten the collet | – Avoid overtightening and damaging the collet – Check for a secure and stable fit |
Router Bit Savvy
Understanding Router Bits for Optimal Woodworking
When it comes to using a router for woodworking, having the right router bits is essential. There are two main types of router bits: carbide-tipped and high-speed steel. Each type has its own advantages and considerations to keep in mind.
Carbide Router Bits: Durability and Longevity
Carbide router bits are highly recommended for their durability and longevity. These bits feature a carbide tip that is extremely hard and wear-resistant. Carbide bits can withstand the demands of heavy-duty cutting tasks, making them ideal for professionals and avid woodworking enthusiasts. Whether you’re shaping intricate profiles or cutting through tough materials, carbide router bits deliver exceptional performance and maintain their sharpness for an extended period.
High-Speed Steel Router Bits: Versatile and Affordable
On the other hand, high-speed steel router bits are a versatile and affordable option. They are commonly used for less demanding woodworking applications. High-speed steel bits are made from a hardened steel alloy that offers good heat resistance and can be easily sharpened when dulled. These bits are a popular choice among beginners or hobbyists who need reliable bits for occasional woodworking projects.
Choosing the Right Router Bit Shank Size
Another important consideration when selecting router bits is the shank size. The shank is the cylindrical portion of the bit that is inserted into the router’s collet. Router bit shank sizes typically range from 1/4-inch to 1/2-inch. It’s crucial to ensure that the shank size of the router bit matches the collet size of your router. Using a router bit with an incompatible shank size can result in poor performance and potential safety risks.
Benefits of Using 1/2-Inch Shank Bits
While both 1/4-inch and 1/2-inch shank bits have their merits, using 1/2-inch shank bits generally results in cleaner cuts. The larger shank size provides greater stability and reduces vibration during cutting, resulting in smoother finishes and improved accuracy. If your router is equipped with a 1/2-inch collet, it is highly recommended to take advantage of the benefits offered by 1/2-inch shank bits.

| Router Bit Type | Advantages |
|---|---|
| Carbide-Tipped Bits | Durable and long-lasting |
| High-Speed Steel Bits | Versatile and affordable |
| Shank Size | Benefits |
|---|---|
| 1/4-inch | Suitable for lighter woodworking tasks |
| 1/2-inch | Provides stability and reduces vibration for cleaner cuts |
Important Router Parts
Understanding the key parts of a router is crucial for using and maintaining the tool properly. Here are the essential components of a router:
- Router Motor: The motor is the heart of the router, converting electrical energy into mechanical energy to drive the cutting blade. It is responsible for providing the power necessary for smooth and precise cuts.
- Router Collet: The collet is the component that holds the router bit in place. It ensures a secure and stable connection between the bit and the router, allowing for accurate cuts with minimal vibration.
- Router Base: The base of the router provides stability and support during operation. It allows the bit to protrude for cutting while ensuring control and precision. Different base designs are available to accommodate various types of woodworking tasks.
- Router Speed Control: Router speed control allows the user to adjust the operating speed of the router cutter. This feature is important for optimizing cutting performance and achieving desired results for different types of wood and cuts.
A comprehensive understanding of these important router parts will enhance your woodworking experience and enable you to achieve professional-quality results. Explore the functionalities and potential of each component to take full advantage of your router.
Suggested Flow:
- Introduction to the importance of understanding router parts.
- Description of the router motor and its role in powering the cutting blade.
- Explanation of the router collet’s function in securely holding the router bit.
- Details about the router base and its role in providing stability during operation.
- Information about router speed control and its significance in adjusting the operating speed for different cuts.
- Summary and reinforcement of the importance of understanding these key router parts.
Router Safety Tips
Safety should always be a top priority when using a router. Whether you’re a seasoned woodworker or a beginner, it’s crucial to follow proper safety guidelines to protect yourself and those around you. Here are some essential router safety tips to keep in mind:
1. Keep a firm grip on the tool: A router is a powerful tool that requires steady handling. Always maintain a firm grip on the router, ensuring that both hands are securely holding the handles. This will provide better control and minimize the risk of accidents.
2. Use personal protective equipment: When operating a router, always wear the appropriate personal protective equipment (PPE). This includes safety glasses or goggles to protect your eyes from flying wood chips or debris, and gloves to provide a better grip and protect your hands from potential injuries.
3. Regularly inspect and maintain the router: Before each use, inspect the router for any damage or loose parts. Ensure that the power cord is in good condition and the switch is functioning properly. Additionally, keep the router clean and free from debris to prevent interference with its operation.
Remember, safety is paramount when using a router. By following these safety tips and best practices, you can minimize the risks and confidently enjoy your woodworking projects. Stay safe and happy woodworking!