
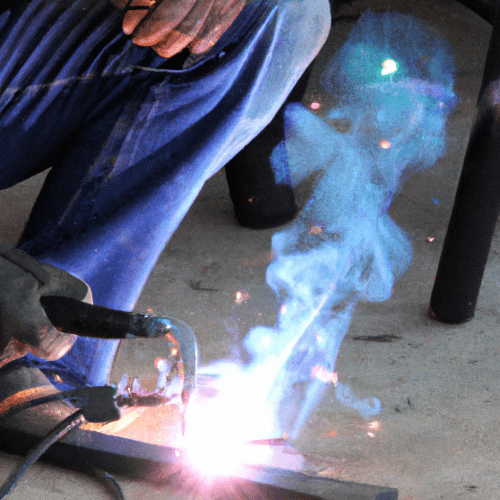
Learning to weld independently is a rewarding endeavor, opening doors to fabrication, repair, and artistic metalwork. Modern equipment and abundant resources make acquiring welding skills more accessible than ever before. A structured approach, combining theoretical knowledge with hands-on practice, is key to developing proficiency and ensuring safety in a home workshop environment.
Beginning welders often find Metal Inert Gas (MIG) welding to be the most forgiving process due to its relative ease of learning and versatility. This method utilizes a continuously fed wire electrode and a shielding gas to create clean, strong welds with minimal cleanup, making it ideal for hobbyists and light fabrication tasks.
Selecting Your First DIY Welding Kit
Choosing the right DIY welding kit is the foundational step for any aspiring home welder. Entry-level MIG welders, often dual-voltage (110V/220V), provide flexibility for various projects and power sources commonly found in home garages. Models like the ARCPEX MIG200 are frequently recommended for beginners, offering features such as synergic auto-setup, which simplifies voltage and wire speed adjustments.
Hobbyist welders typically require machines with an amperage output ranging from 140A to 200A, suitable for welding mild steel up to 3/16 inch to 5/16 inch thick. A duty cycle of 20-30% at a given amperage is generally sufficient for light tasks and occasional use, allowing for continuous operation for 2-3 minutes out of a 10-minute cycle before requiring a cool-down period.
When evaluating kits, prioritize those with pure copper cables for stable arc performance and robust cooling systems to prevent overheating during extended practice sessions. Many kits now include essential accessories like torches, ground clamps, gloves, and wire, providing a comprehensive starting package.
Leveraging Online Resources for Welding Education
| Steel Thickness | Voltage (V) | Wire Feed Speed (IPM) | Amperage (Approx. A) |
|---|---|---|---|
| 1/16″ (1.6mm) | 16-17 | 150-200 | 65-90 |
| 1/8″ (3mm) | 17-18 | 220-260 | 110-130 |
| 3/16″ (4.8mm) | 18.5-20 | 280-320 | 140-180 |
| 1/4″ (6.4mm) | 20-22 | 300-350 | 200-230 |
The digital age offers an unparalleled wealth of online video tutorials and courses specifically designed for beginner welders. Platforms such as YouTube, Udemy, and Class Central host numerous guides covering everything from basic machine setup to advanced techniques.
These resources often demonstrate proper gun positioning, travel speed, and how to ‘read’ the weld bead for feedback on settings. Many instructors emphasize the importance of listening to the arc, which should sound like ‘bacon frying’ when settings are optimal.
While online tutorials are invaluable for visual learning, they should complement hands-on practice. Some online courses even offer structured curricula that guide learners through progressive exercises, building confidence and skill systematically.
Mastering Basic MIG Welding Techniques
Achieving a quality MIG weld hinges on correctly setting voltage, wire feed speed, and maintaining consistent technique. For mild steel, a common professional guideline suggests approximately 1 amp per 0.001 inch of material thickness. For instance, welding 1/8 inch (0.125 inch) steel typically requires around 125 amps.
Wire feed speed (WFS) directly influences amperage and deposition rate, while voltage controls arc length and bead profile. A balanced combination is crucial; too high a voltage can cause undercut, while too low results in an unstable arc. Shielding gas, commonly a 75% Argon / 25% CO₂ mix for mild steel, protects the weld pool from atmospheric contamination, ensuring a clean and strong bond.
Proper gun angle is also critical. For butt joints, hold the gun at 90 degrees to the workpiece. For fillet welds, a 45-degree angle is effective. When pushing the weld puddle, maintain a slight angle of 10-15 degrees in the direction of travel, keeping the nozzle 1/4 to 1/2 inch from the workpiece. Consistent travel speed and a steady hand are developed through repetitive practice, aiming for a weld bead that resembles a ‘stack of dimes’.
Selecting and Preparing Practice Materials
Starting with the correct practice material significantly impacts the learning curve. Mild steel, particularly in 1/8 inch or 3/16 inch thick plates, is universally recommended for beginners due to its affordability, widespread availability, and forgiving nature during welding. It behaves predictably under heat, allowing new welders to focus on technique without battling complex material properties.
Once comfortable with mild steel, welders can progress to stainless steel, which demands more heat control, or aluminum, which presents challenges due to its lower melting point and high thermal conductivity. Sourcing scrap metal from local recyclers, machine shops, or even construction sites can provide cost-effective practice material. Always ensure the metal is clean and free of rust, paint, oil, or other contaminants before welding, as impurities can compromise weld quality and produce hazardous fumes.
Ensuring Home Garage Welding Safety
Safety is paramount in any welding operation, especially in a home garage setting where professional infrastructure might be lacking. Personal Protective Equipment (PPE) is non-negotiable and includes an auto-darkening welding helmet with a variable shade control (typically shade 9-13 for most processes), ANSI Z87.1-rated safety glasses worn underneath, and flame-resistant clothing.
Essential clothing comprises a leather welding jacket, heavy-duty gloves, long pants, and high-top leather work boots to protect against sparks, spatter, and intense heat. Respiratory protection, such as a respirator or dust mask, is also crucial to guard against welding fumes, particularly in enclosed spaces.
The welding area itself must be meticulously prepared. Remove all combustible materials, including oil stains, gas cans, wood, fabrics, and solvents, from within a 35-foot radius of the work zone. The floor should ideally be non-combustible, such as concrete or tile, and welding blankets or screens should be used to shield any immovable flammable objects. Adequate ventilation is critical to disperse fumes, and a suitable dry chemical fire extinguisher must be readily accessible. After welding, a ‘fire watch’ period of at least 30 minutes is recommended to check for any smoldering embers.