Over a decade in the CNC world and it feels like just yesterday when I first heard that machine whirr into action. From the clunky old-school systems to the smart, sleek ones of today, we’ve come a long way. I’ve seen and adapted to so much change in the CNC world, and yet, some things remain the classics. Speaking of classics, let’s dive into some milling operations. Grab your favorite beverage, maybe put on those old safety goggles for the nostalgia, and let’s talk shop.
Face Milling
Ah, good old face milling. If CNC machining was an orchestra, face milling would be its lead instrument. It’s the process we use primarily to generate a flat surface that’s perpendicular to the tool axis. You remember the first time you got that perfect sheen on a workpiece? That was probably face milling. You’re essentially using a cutter that has teeth both on its face and its periphery. This allows you to clear a lot of material at once, giving you that pristine finish. It’s kind of like using a lawnmower: you’re skimming the top off. And given the wide cutting surface, face milling can have a lot of wear and tear on the cutter, so keeping an eye on tool life and ensuring it’s sharp is key. But once you get the hang of it, man, those surfaces come out smoother than a jazz tune.
Plain Milling
Moving on to plain milling, or as some of the old-timers call it, slab milling. With plain milling, we’re talking about producing a flat, horizontal surface parallel to the tool axis. Unlike face milling where you’re focused on that top layer, with plain milling, you’re working more in-depth, literally. This is where the cutter’s helical teeth do the magic. Remember that job where the client wanted a series of flat surfaces, and you were running the machine almost non-stop? Yeah, that’s plain milling for you. It’s the bread and butter for most projects and, when done right, it provides that consistency we all aim for.
Side Milling
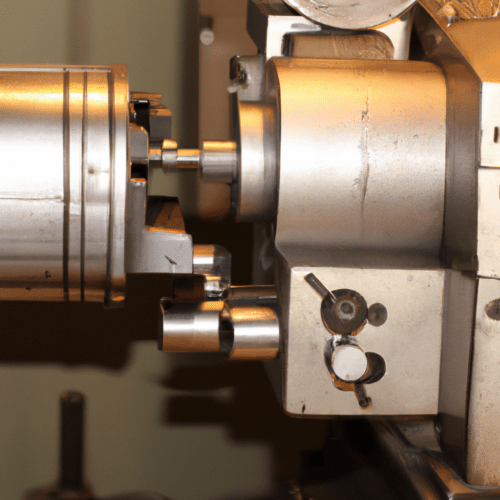
Alright, let’s switch gears a bit. Think of side milling as the cousin of plain milling. Instead of that horizontal action, we’re looking at creating a vertical surface on the side of a workpiece. The cutter’s diameter is of prime importance here. You’ve got to make sure it’s slightly larger than the width of the workpiece to get that ideal side finish. Whether you’re just squaring off a piece or trying to get to a specific depth, side milling is the star player. Remember that intricate design project where the side profiles were as important as the main surface? Yeah, we owe that precision to side milling.
Straddle Milling
And now, for the pièce de résistance: straddle milling. Picture this: you’ve got two cutters, spaced out by spacers or collars, working simultaneously on a workpiece. It’s like synchronized swimming but for CNC. You’re basically producing two parallel surfaces in a single pass. Straddle milling is a favorite for operations that require efficiency and speed, especially when those exact same slots or flats need to be milled at an equal distance from the central axis. If you’ve ever had a project where the client needed multiple pieces with similar parallel cuts, you know how invaluable straddle milling can be.
Gang Milling
No, it’s not a group of milling machines forming an alliance (though wouldn’t that be something?). Gang milling is, in essence, a multitasking operation. Imagine you’ve got multiple cutters on the same machine arbor, all working their magic on the workpiece simultaneously. Each cutter can be set for a different operation, so it’s like having a mini production line on a single run. For instance, you could be doing a mix of slab milling, slot milling, and end milling all at once. It’s an impressive show of efficiency. Back in the day, I recall a project where we had to churn out parts at breakneck speed with varied profiles. Gang milling was our secret sauce. The real challenge? Getting all those cutters aligned perfectly. But once you nail it, it’s smooth sailing, and your machine is like a rock band with every member playing a different tune, yet all in harmony.
Angle Milling
Next up, angle milling, and it’s exactly what it sounds like. Instead of our usual flat or straight cuts, we’re diving into angular territory. The cutter, in this scenario, is set at an angle other than perpendicular to the surface of the workpiece. Think of those tasks where you needed a slanted or inclined plane, or maybe that V-shaped groove – that’s angle milling working its charm. The key player here is the single or double-angle milling cutter. And, if you’ve ever tried setting it up, you know the precision required. One small misalignment and your angle’s all wrong. But get it right, and it’s like watching a sculptor chisel away, leaving behind a masterpiece of angles and planes.
Form Milling
And, last but definitely not least, form milling. This is where the artistic side of CNC machining shines through. Form milling uses specially shaped cutters that are designed to produce contours, concavities, convexities, or any other similar desired surface. Picture those irregular profiles and contours on a workpiece; whether it’s a scalloped pattern or a complicated design, form milling is the hero behind the scenes. The beauty of form milling is in the customization. Each cutter is specially designed for a specific job. Remember that one project with the intricate logo engraving or that other one with the unique ornamental design? All that jazz was the magic of form milling. The key, though, is in the tool maintenance. Those cutters, being so uniquely shaped, need that extra TLC to keep them sharp and efficient.
End Milling
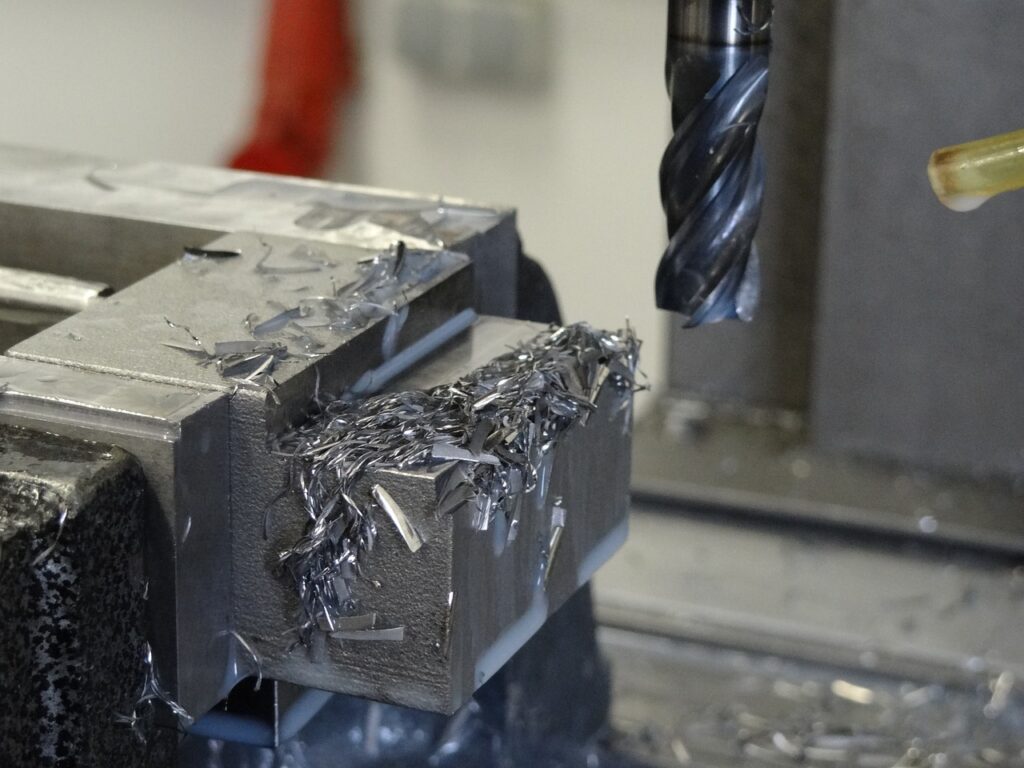
Kicking it off with end milling. You can think of this operation as the swiss army knife in our toolkit. It’s versatile and essential. The primary goal? To produce a flat surface which is perpendicular to the shank of the cutter. Unlike face milling where the cutting is mostly on the tip, end milling uses both the peripheral and the end teeth of the cutter. Whether you’re working on a pocket, profile, or even a simple surface – end milling has got your back. It’s the operation you often turn to when others can’t quite cut it. And with the variety of end mills available, like ball nose, square type, and more, there’s always a tool that fits the bill.
Conventional Milling and Climb Milling Operations
Let’s chat about the age-old debate: conventional milling vs. climb milling. Both have their place, and understanding the difference is paramount.
- Conventional Milling (or Up Milling): Here, the cutter rotates against the direction of feed. As a result, the workpiece tends to get pushed away. The initial contact is gradual, and it thickens as the cut progresses. This operation often gives a better finish on the workpiece, but the downside? It can lead to more tool wear.
- Climb Milling (or Down Milling): The cutter moves in the same direction as the feed, which means it sort of ‘climbs’ into the work. This ensures a thick cut at the beginning which becomes thinner. It usually results in less tool wear and can be faster. However, if your machine has some backlash, you might get a poorer finish due to the cutter being pulled along.
The great debate between the two really boils down to your machine, the material, and the desired finish. Both have their moments, and mastering when to use each is like knowing when to play the right card in a game.
Saw Milling
Switching gears, let’s talk about saw milling. It’s pretty much what it sounds like: using a milling machine like a saw to cut out sections of a workpiece. The cutter looks a lot like a thin, slotted saw. This operation is perfect for deep slots or for cutting off parts. And while it sounds straightforward, ensuring that the cutter doesn’t get clogged and maintaining a consistent feed rate are crucial for those perfect, clean cuts.
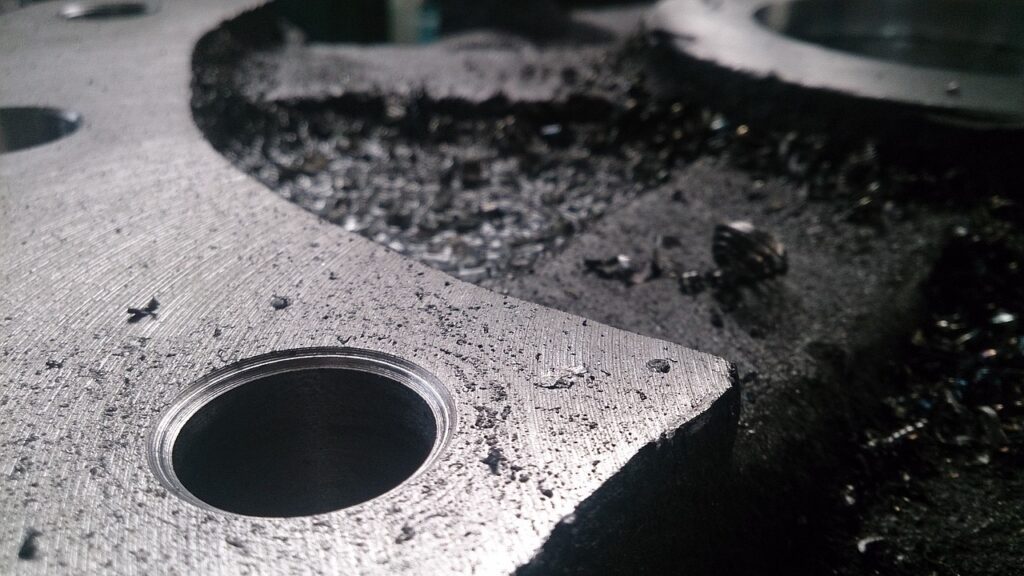
Milling Keyways, Grooves, and Slots
Ah, the nuances of CNC. When you need that precision groove or that perfect slot, this is where you turn. Keyways, grooves, and slots might sound minor, but we all know they’re paramount in assembly and function.
- Keyways: These are essentially grooves in shafts that allow keys to fit in, ensuring components don’t slip. They need to be precise, as any imperfection can result in a poor fit and lead to operational issues.
- Grooves: These are more of general recesses or furrows, not necessarily for keys. Think of o-ring grooves or other similar features on a part.
- Slots: Imagine wider grooves with open ends. They might be for assembly, for fittings, or for any number of functional purposes in a design.
Getting these right requires a blend of the right cutter, precise measurements, and often a lot of patience. But when they fit just right in the final product, oh, the satisfaction!
Gear Cutting
Gear cutting is an art and science combined. It’s about creating those precise toothed wheels that are essential for transmitting motion and power. Whether it’s the spur gears, helical gears, or bevel gears, every tooth counts. Precision is the name of the game. The process typically uses form-relieved cutters shaped to the profile of the gear tooth. It’s kind of like using a cookie cutter, but instead of cookies, you’re producing gears that need to mesh seamlessly. And considering the variety of gear profiles out there, it’s no small feat. Those of us who’ve dabbled in gear cutting know the joy (and sometimes the heartache) of getting them just right.
Thread Milling
The goal here is to produce those precise helical grooves that help in fastening or motion transfer. While tapping is a more common operation for threads, milling brings its own set of advantages, especially for very large or oddly positioned threads. The milling cutter, which is essentially a thread-shaped tool, moves in a helical path corresponding to the thread’s pitch. The result? Clean, precise threads. And with CNC (which we’ll dive into next), you can achieve threads on complicated surfaces or at tricky angles with relative ease.
Cam Milling
Cams, with their unique and often asymmetrical profiles, play crucial roles in many mechanisms. Think of them as the unsung heroes, transforming rotary motion into linear motion or vice versa. Cam milling requires specially designed cutters that match the cam profile. Given the variety of cam shapes – from simple egg-shaped ones to complex heart or pear-shaped cams – this operation demands a blend of careful planning and precision execution. Once you’ve milled a few cams and seen them in action, it’s hard not to appreciate the blend of artistry and engineering behind them.
CNC Milling
And last, but certainly not least, let’s touch on CNC milling. Now, while CNC is more of a method than a specific operation, it’s revolutionized the way we approach all the aforementioned processes. With CNC, gone are the days of manual calculations and painstaking adjustments. Instead, we have machines guided by computer-aided design (CAD) models. The result? Unparalleled precision, repeatability, and complexity. Whether you’re thread milling on an unconventional surface, carving out intricate cam profiles, or cutting gears that need to mesh perfectly, CNC milling has made these tasks more manageable and accurate. Plus, with the advent of modern software and advanced machines, multi-axis milling, adaptive machining, and high-speed milling are just a few of the wonders we now have at our fingertips. For the seasoned machinists who transitioned from manual to CNC operations, the shift was nothing short of a revolution, introducing a realm of possibilities and complexities that were previously unimaginable.