The Arduino Uno is widely considered the best choice for CNC projects due to its compatibility with popular CNC firmware like GRBL and its extensive community support. Its simplicity and affordability make it ideal for beginners and small-scale CNC machines like the 3018 carving machine. For more advanced projects or larger CNC setups, the Arduino Mega with a RAMPS shield offers additional capabilities and pin connections.
The Mega’s increased processing power and memory can be beneficial for complex CNC operations. When selecting an Arduino for a CNC project, it’s crucial to consider the specific requirements of your machine, the firmware you plan to use, and your level of expertise. Many CNC enthusiasts opt for the Uno paired with a CNC shield, as this combination provides a cost-effective and reliable solution for controlling stepper motors and other CNC components. Regardless of the chosen board, ensure it’s compatible with your CNC firmware and has sufficient I/O pins to handle your machine’s motors, limit switches, and other peripherals.
- Choosing the right Arduino is essential for CNC projects.
- There are various Arduinos available for different CNC applications.
- Arduino CNC shields enhance the capabilities of Arduino for CNC projects.
- Selecting the right software is crucial for CNC projects.
- Building your own Arduino CNC machine allows customization.
Understanding the Basics of Arduino
Before diving into the best Arduino options for CNC projects, it is important to understand the basics of Arduino. Arduino is an open-source electronics platform that allows users to create interactive objects or environments. It consists of a microcontroller, which acts as the brain of the Arduino board, and can be programmed using the Arduino IDE (Integrated Development Environment). There are various Arduino boards available, each with its own unique features, specifications, and capabilities. Understanding how Arduino works and its programming language is essential for getting the most out of your CNC projects.
To give you a glimpse of Arduino’s capabilities, here are its key components:
- Microcontroller: The microcontroller is the heart of the Arduino board. It carries out instructions and processes input/output signals.
- Arduino IDE: The Arduino IDE is a software tool used for writing, compiling, and uploading code to the Arduino board.
- Arduino Boards: Arduino offers a range of boards, each designed for specific purposes. Some popular Arduino boards include Arduino Uno, Arduino Mega, and Arduino Nano. These boards differ in terms of size, input/output options, memory capacity, and processing power.
With Arduino, you can harness the power of programming to control sensors, motors, lights, and other electronic components. Its user-friendly programming language and extensive community support make it accessible to beginners and experts alike.
Arduino Programming Language
Arduino programming is done using a simplified version of C and C++. The code is written in the Arduino IDE, which provides a streamlined environment for writing, testing, and uploading code to the Arduino board.
Here is a simple example of Arduino code that blinks an LED:
void setup() {
  pinMode(LED_PIN, OUTPUT);
}

void loop() {
  digitalWrite(LED_PIN, HIGH);
  delay(1000);
  digitalWrite(LED_PIN, LOW);
  delay(1000);
}
This code sets up the LED pin as an output in the setup function and toggles the LED on and off in the loop function with a delay of 1 second between each state change.
With Arduino’s programming language and IDE, you have the flexibility to create custom functionalities for your CNC projects, such as controlling stepper motors, reading sensor data, and implementing intricate motion patterns.
Now that we have covered the basics of Arduino, let’s move on to exploring the best Arduino options for CNC projects.
Choosing the Right Arduino for Your CNC Controller
When it comes to CNC projects, selecting the appropriate Arduino for your CNC controller is crucial. There are several options to consider, including the Arduino Uno, Arduino Mega, Arduino Due, and Arduino Nano. Each of these Arduino boards has its own unique features and advantages.
The Arduino Uno is often recommended for beginners due to its simplicity and abundant availability of resources. It is an excellent choice for entry-level CNC projects. On the other hand, the Arduino Mega, with its greater number of pins, is suitable for more complex CNC projects that require a greater level of control and expansion capabilities.
If you require faster processing speed for your CNC controller, the Arduino Due is an excellent option. It is equipped with a more powerful microcontroller, which allows for improved speed and performance. Additionally, it has a larger memory capacity, which can be advantageous for handling complex CNC tasks.
For projects with space constraints or smaller-scale CNC machines, the Arduino Nano is a compact board that can be easily integrated into tighter spaces. Despite its smaller size, it still offers a robust feature set and can handle many CNC applications effectively.
To help you make an informed decision, here is a comparison table showcasing the key specifications of these Arduino boards:
| Arduino Board | Features |
|---|---|
| Arduino Uno | Simple, beginner-friendly, wide availability of resources |
| Arduino Mega | More pins, suitable for complex projects |
| Arduino Due | Faster processing speed, larger memory capacity |
| Arduino Nano | Compact size, fits in smaller spaces |
By considering your project requirements and budget, you can choose the Arduino board that best aligns with your needs. Whether you are a beginner or an experienced CNC enthusiast, Arduino provides a range of options to ensure the success of your CNC projects.
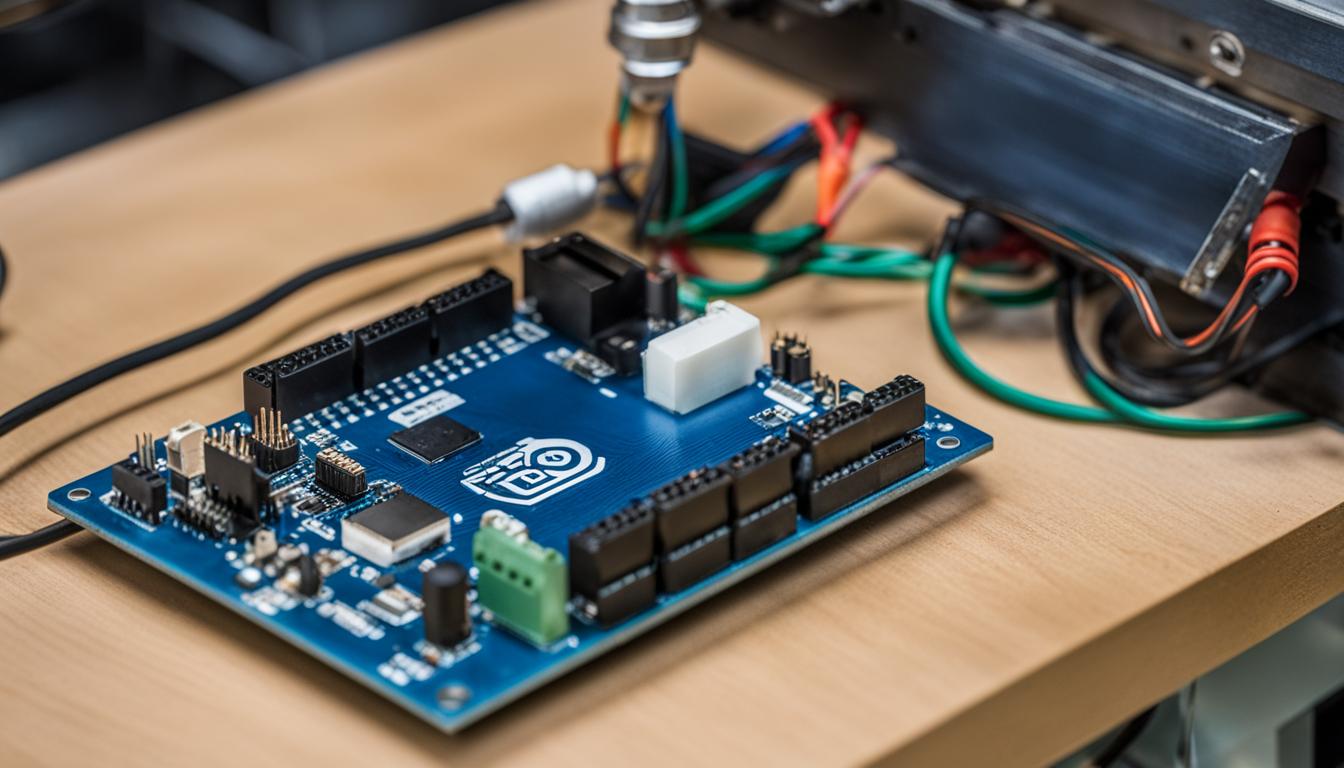
Exploring Arduino CNC Shields
Arduino CNC shields are add-on boards that can be stacked onto the Arduino board to enhance its capabilities for CNC projects. These shields are specifically designed for CNC applications and offer features such as stepper motor drivers, spindle control, and limit switches. By utilizing Arduino CNC shields, you can simplify the control of your CNC machine and interface with various components.
The two most common Arduino CNC shields are the GRBL shield and A4988 stepper motor driver. The GRBL shield is compatible with the popular GRBL firmware, allowing for precise control of stepper motors and spindle speed. It also provides inputs for limit switches, which are essential for ensuring the safety and accuracy of your CNC machine.
The A4988 stepper motor driver is another popular choice, offering high-performance motor control for CNC applications. It supports up to 2A of current per coil, providing sufficient power for driving various stepper motors. Additionally, it features microstepping capabilities, allowing for smoother and more precise movement.
If you are looking for a plug-and-play solution for your CNC projects, Arduino CNC shields are worth considering. They provide an easy and efficient way to enhance the capabilities of your Arduino board specifically for CNC applications.

| Arduino CNC Shield | Features |
|---|---|
| GRBL Shield | – Compatible with GRBL firmware – Stepper motor control – Spindle speed control – Limit switch inputs |
| A4988 Stepper Motor Driver | – High-performance motor control – Up to 2A current per coil – Microstepping capabilities |
Selecting the Right Arduino CNC Software
In addition to choosing the right hardware, selecting the right software is crucial for CNC projects. The software you choose will determine the functionality, ease of use, and control options for your Arduino CNC machine. There are several popular software options available for Arduino CNC projects, each with its own unique features and advantages.
Grbl
Grbl is an open-source software that is widely used for controlling CNC machines. It is compatible with Arduino boards and provides a simple and efficient way to control your CNC machine. Grbl offers smooth and precise movement control, real-time feedback, and support for various G-code formats. With its extensive community support and online resources, Grbl is a popular choice for both beginners and experienced users.
Mach3
Mach3 is a commercial software that offers a comprehensive set of features and capabilities for CNC machines. It provides advanced control options, customizable user interfaces, and support for multiple axes. Mach3 is known for its reliability and versatility, making it a preferred choice for professional CNC applications. However, it should be noted that Mach3 is not open-source and requires a license for full access to all its features.
Universal Gcode Sender
Universal Gcode Sender is a user-friendly software option for controlling CNC machines with Arduino. It provides a clean and intuitive interface, making it easy to set up and operate your CNC machine. Universal Gcode Sender supports various G-code formats and offers real-time machine status monitoring. This software is suitable for both beginners and hobbyists looking for a straightforward CNC control solution.
ChiliPeppr
ChiliPeppr is a cloud-based CNC software that allows you to control your Arduino CNC machine from anywhere with an internet connection. It offers a browser-based interface, eliminating the need for installing software on your computer. ChiliPeppr provides a range of features, including G-code editing, visualization, and real-time control. It is a convenient option for those who prefer remote access and cloud-based storage for their CNC projects.
When choosing the right Arduino CNC software, consider your specific project requirements, budget limitations, and user interface preferences. Whether you opt for the open-source flexibility of Grbl, the comprehensive features of Mach3, the user-friendly interface of Universal Gcode Sender, or the cloud-based convenience of ChiliPeppr, you can find the software that best suits your needs.
Building Your Own Arduino CNC Machine
If you prefer a hands-on approach and want to build your own Arduino CNC machine, there are several DIY options available. Building your own CNC machine allows you to customize it according to your specific needs and budget. You can choose the size, type of motors, and other components based on your project requirements.
There are numerous resources, tutorials, and kits available online to help you get started with building your own Arduino CNC machine. Whether you are interested in a small CNC router or a large-scale DIY CNC machine, Arduino provides the flexibility and versatility to create your dream CNC project.
With a homemade CNC machine, you have the freedom to experiment, innovate, and develop projects that are tailored to your specific needs. You can explore different design ideas, materials, and functionalities, all while gaining valuable hands-on experience.
By building your own Arduino CNC machine, you not only save money compared to buying a pre-made machine but also have the satisfaction of creating something unique and customized. Whether you are a hobbyist or a professional, embarking on a DIY CNC project can be a rewarding and fulfilling experience.
Arduino CNC Projects and Tutorials
Arduino CNC projects offer an exciting opportunity for DIY enthusiasts to explore the world of computer numerical control. With Arduino, you can bring your ideas to life, whether you’re interested in simple tasks like engraving and cutting or more complex projects such as 3D printing and milling. Arduino’s versatility makes it a perfect fit for a wide range of CNC applications.
There are countless Arduino CNC project ideas available online, making it easy to find inspiration and step-by-step tutorials to help you get started. These resources provide valuable insights and guidance for beginners and advanced users alike. Through these tutorials, you can learn various CNC techniques and implement them into your own projects using Arduino.
Exploring Arduino CNC Project Ideas
- Engraving and cutting designs on wood, metal, and other materials
- Creating a CNC router for precision woodworking
- Designing a 3D printer to bring your digital models to life
- Building a CNC milling machine for intricate and precise machining tasks
- Developing a laser cutter for etching and cutting precise patterns
- Constructing a CNC foam cutter for shaping foam materials
These project ideas showcase the versatility of Arduino in CNC applications. Whether you’re a hobbyist or a professional, there’s an Arduino CNC project that can spark your creativity and help you achieve your goals.
Implementing Arduino CNC Code
To execute your CNC projects, you’ll need to understand and implement Arduino CNC code. Fortunately, there are plenty of example codes available that can be customized to suit your specific needs. By learning the basics of Arduino programming language and leveraging existing code snippets, you can create powerful and efficient CNC programs with ease.
Whether you’re looking to optimize tool paths, implement adaptive machining strategies, or precisely control motor movements, Arduino CNC code provides the flexibility and control necessary to bring your projects to life.
Learning from CNC Tutorials
Alongside project ideas and example code, tutorials play a vital role in expanding your knowledge and honing your CNC skills. These resources guide you through the various steps of a project, helping you understand the underlying principles and providing useful tips along the way. Some tutorials even offer video demonstrations, making it easier to grasp complex concepts.
By investing time in learning from CNC tutorials, you can gain valuable insights into design considerations, tool selection, assembly techniques, troubleshooting common issues, and much more. This knowledge empowers you to tackle more advanced Arduino CNC projects and unlock new possibilities.

As you explore Arduino CNC projects and tutorials, remember that experimentation and iteration are key to advancing your skills. Don’t be afraid to experiment with new ideas, make adjustments to existing designs, and push the boundaries of what’s possible. Arduino’s open-source nature encourages a community of learners and makers, offering support and inspiration along the way.
Tips and Tricks for Arduino CNC Projects
When working on Arduino CNC projects, it is important to keep in mind certain tips and tricks that can help you achieve optimal performance and results. By following best practices and troubleshooting common issues, you can enhance the functionality and reliability of your Arduino CNC projects.
Understanding the Limitations
Before diving into your Arduino CNC project, it is crucial to understand the limitations of your Arduino board. Each Arduino model has its own specifications and capabilities, so make sure to familiarize yourself with the specific features of your board. This will help you plan your project accordingly and avoid any potential performance issues.
Troubleshooting Common Issues
While working on your Arduino CNC project, you may encounter common issues such as stepper motor misalignment, erratic movements, or communication errors. To troubleshoot these problems, start by checking your wiring connections and ensuring that they are properly secured. You should also verify that you are using the appropriate power supply for your CNC machine. Additionally, regularly inspecting and maintaining your CNC machine can prevent potential issues and prolong its lifespan.
Optimizing Code for Speed and Efficiency
Efficient code is essential for achieving smooth and precise movements in your Arduino CNC project. Optimize your code by minimizing unnecessary calculations, using efficient algorithms, and avoiding delays or long processing times. This will help improve the speed and accuracy of your CNC machine, resulting in better overall performance.
Proper Wiring and Grounding
Proper wiring and grounding are crucial for ensuring the stability and reliability of your Arduino CNC project. Make sure to use appropriate gauge wires, secure connections, and sufficient grounding to minimize electrical interference and signal noise. This will help maintain consistent and accurate communication between your Arduino board and the components of your CNC machine.
Regular Maintenance
Regular maintenance of your CNC machine is essential for keeping it in optimal condition. Clean the machine regularly, lubricate moving parts, and inspect components for wear and tear. By performing regular maintenance tasks, you can prevent potential issues and ensure the longevity and performance of your Arduino CNC project.
Common Issues and Troubleshooting Tips
| Common Issues | Troubleshooting Tips |
|---|---|
| Stepper motor misalignment | Check wiring connections and ensure proper alignment of the motor shaft |
| Erratic movements | Verify power supply stability, check wiring connections, and adjust stepper motor drivers |
| Communication errors | Ensure proper connection between Arduino board and CNC machine, check baud rate settings, and verify compatibility between software and Arduino board |
| Poor cutting or engraving quality | Optimize feed rates, spindle speeds, and tooling parameters, and ensure proper calibration of the CNC machine |
With these tips and tricks in mind, you can overcome common challenges and achieve successful results in your Arduino CNC projects. Remember to always consult the documentation and resources available for your specific Arduino board and CNC machine to ensure the best possible outcome.
Conclusion
In conclusion, after exploring the various aspects of Arduino for CNC projects, it is clear that choosing the right Arduino is crucial for achieving precision and ease of use. Depending on your specific requirements and project needs, you can select from a range of Arduino boards such as the Arduino Uno, Arduino Mega, Arduino Due, and Arduino Nano. Each board has its own unique features and capabilities, allowing you to find the perfect fit for your CNC projects.
Furthermore, Arduino CNC shields, software, and DIY options provide additional customization and flexibility for your CNC applications. Arduino CNC shields, such as the GRBL shield and A4988 stepper motor driver, enhance the capabilities of your Arduino board by providing features like stepper motor control and spindle control.
When it comes to selecting the right Arduino CNC software, you have options like Grbl, Mach3, Universal Gcode Sender, and ChiliPeppr, each offering their own set of features and user-friendly interfaces. These software solutions enable you to control and optimize your CNC projects with ease.
By exploring Arduino CNC projects and tutorials, implementing best practices, and keeping troubleshooting tips in mind, you can successfully complete your CNC projects with Arduino. Arduino offers endless possibilities for CNC applications, whether you are a beginner or an advanced user. So, harness the power of Arduino and unlock your creativity in the world of CNC.